Wildlife Photography: Eliminating Bad Backgrounds |
|
Wildlife photography inspires professional and amateur photographers
alike. The possibilities of our natural world provide an endless source
of fascination.
Choosing a good subject for a wildlife photo is never difficult. The variety of characters in the animal kingdom provides a never-ending source of material. Even better, some of the best subjects can be found in the city, even in our own backyards. You don’t have to be an intrepid world traveler to enjoy a satisfying hobby as a wildlife photographer.  “Deer by morning light” captured by Spencer Lunn (Click Image to See More From Spencer Lunn) “Deer by morning light” captured by Spencer Lunn (Click Image to See More From Spencer Lunn)A bad background can really spoil the impact of a good wildlife subject, but how do we avoid it? Of course these days there are plenty of people who would just edit it out using a computer, but (believe it or not) most people still prefer to rely on their camera skills rather than on software. Simple Tips to Help You Eliminate a Bad BackgroundPosition yourself to find the best angle to take your photo.Imagine you are trying to photograph a bird in a tree. From one angle, you might be able to see power lines or the roof of the house in the background. If you move to a better angle, you may be able to capture the green foliage of the tree as your background instead. This may seem obvious, but one reason so many photos fail is because the photographer doesn’t bother to make this small extra effort.  “robin root & branches” captured by John Booth (Click Image to See More From John Booth) “robin root & branches” captured by John Booth (Click Image to See More From John Booth)This can be as simple as getting as close as possible to the subject and using your largest lens. This is a very easy technique. Moving closer ensures the subject fills as much of the frame as possible. Your largest lens (or the largest zoom on your lens) narrows the field of view in a photo so that the focus in on the subject, not on the surroundings. The extra advantage of a telephoto lens is that it has a naturally small depth of field. This means while your subject is in focus, everything in front and behind is a blur. So not only does the telephoto lens reduce the amount of background that is visible in your photo, what you can see should be completely out of focus. This is simple photography theory; a wide aperture produces a narrow depth of field. So if you are already using a large lens, and you add a narrow aperture as well, you reduce your depth of field to its absolute minimum. Now you should be able to produce an almost three dimensional image, with your sharply focused subject emerging from a totally out-of-focus background. As you can see from the simplicity of these guidelines, it is easy to reduce the distraction of an unattractive background. It doesn’t take fancy equipment or a diploma in photography. All it takes is a little extra effort, and understanding how to use the camera you have.  “meerkat” captured by Kate McInnes Gluskie (Click Image to See More From Kate Gluskie) “meerkat” captured by Kate McInnes Gluskie (Click Image to See More From Kate Gluskie)Best of all, these are techniques you can try today—so happy snapping! About the Author: Andrew Goodall writes for http://www.naturesimage.com.au and is a nature photographer based in Australia. He manages a gallery in Montville full of landscape photography from throughout Australia. Deal Ending Soon on Plug-in to Edit Photo Backgrounds:Thousands of photographers use Topaz ReMask every day to replace backgrounds, create composites and make selective adjustments. Find out why ReMask is the holy grail of Photoshop plug-ins (see how it works here). Creating masks/selections within photos can be difficult, tedious and time consuming, but good masks make it easy to replace unwanted backgrounds, create compositions and more. The company is offering it at 50% off until the end of the month, simply remember to use the discount code JULYREMASK at checkout. |
|
James Cameron’s Avatar isn’t real, but those awe-inspiring “
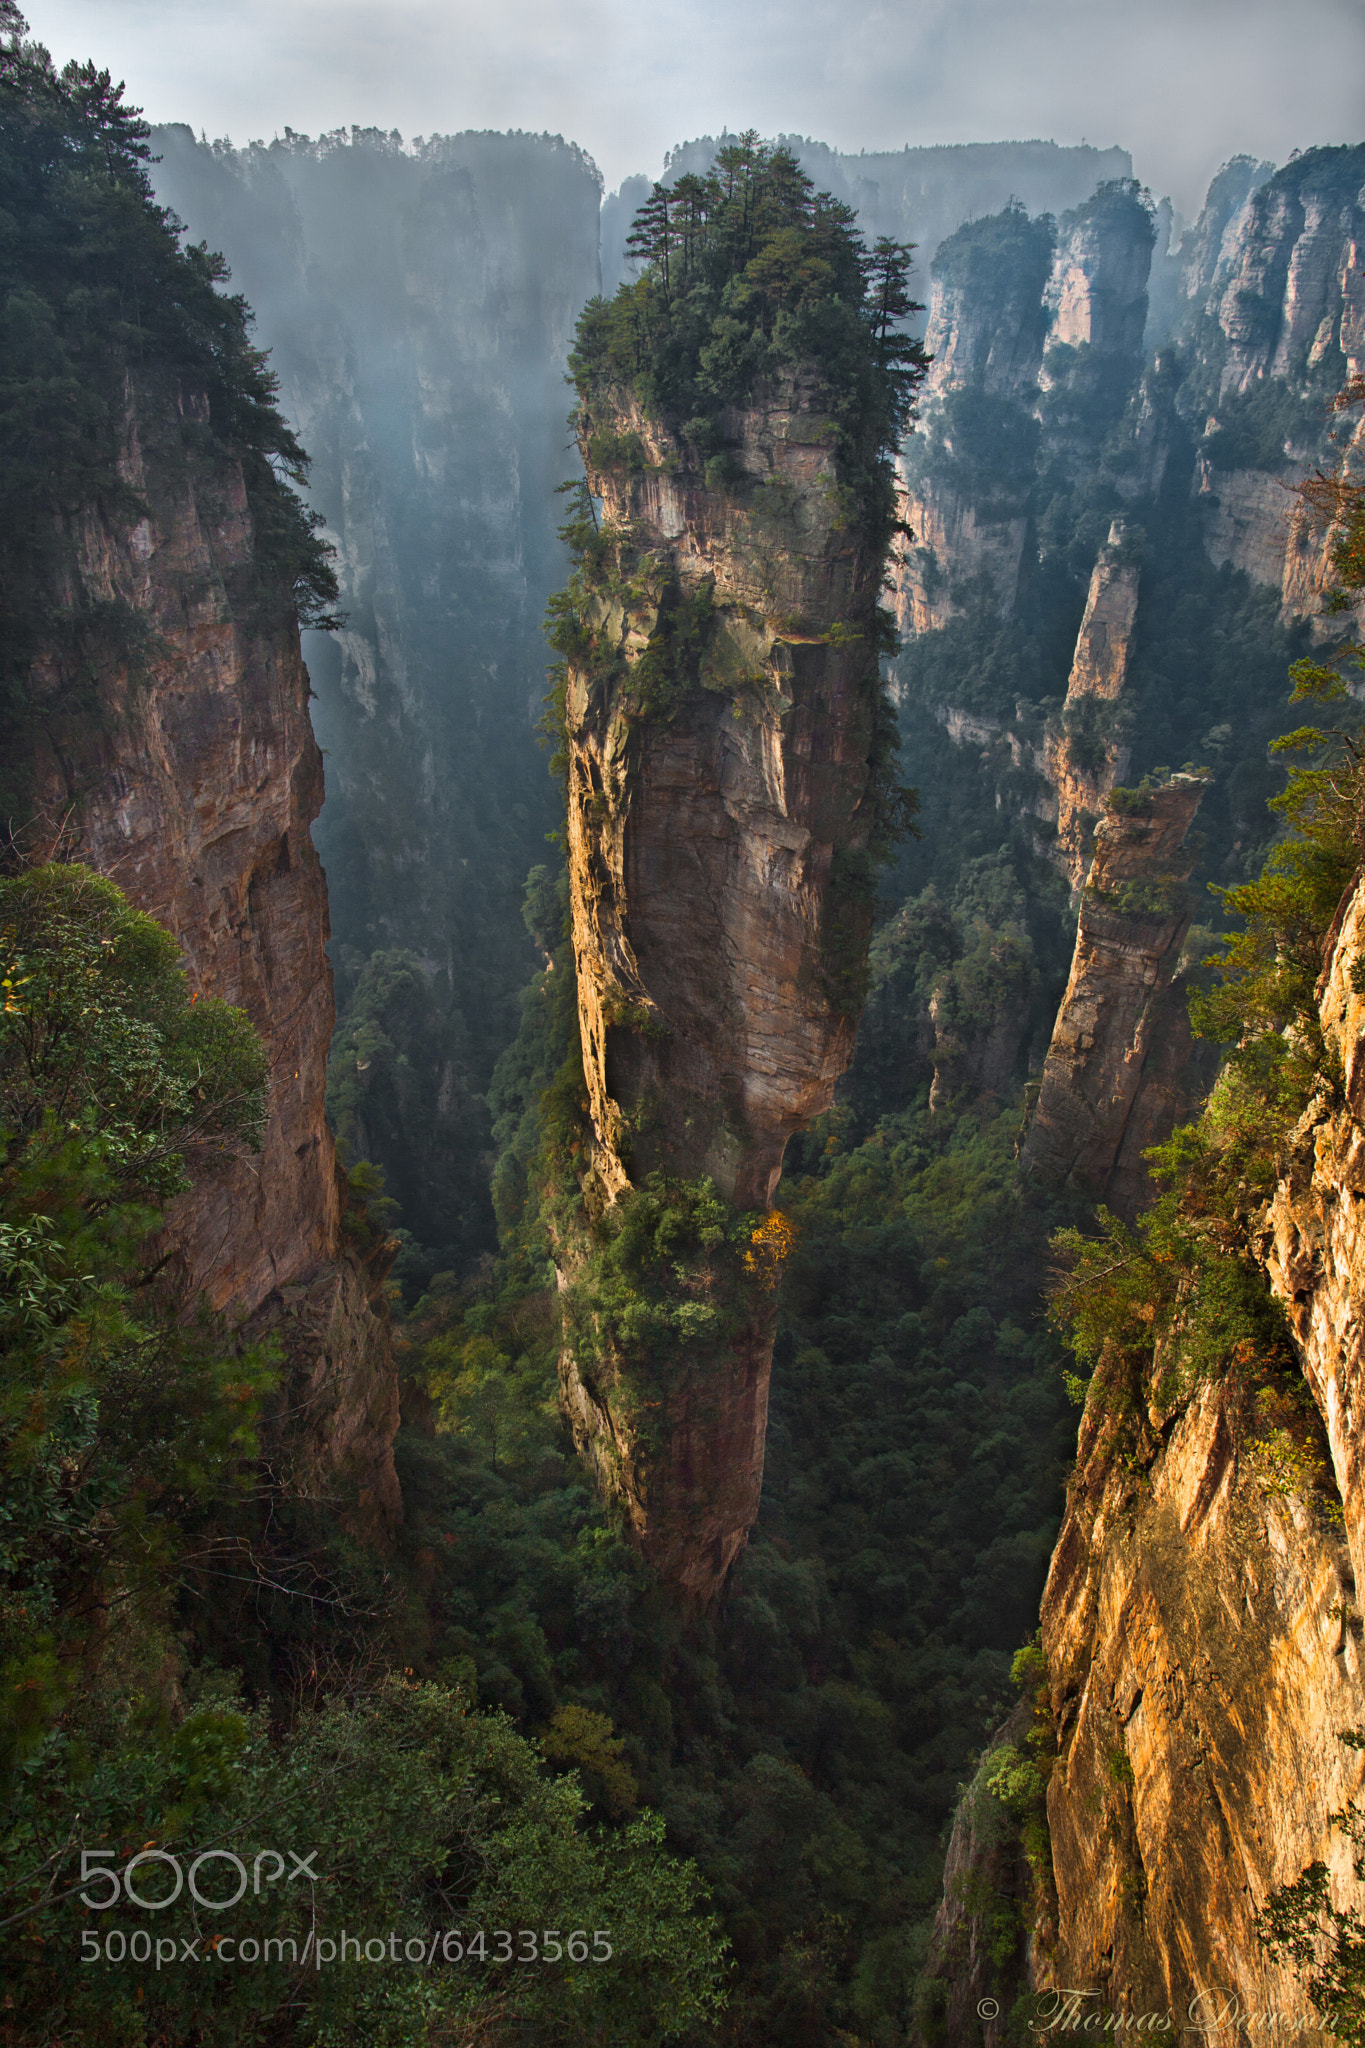 “One of a Kind” by Thomas Dawson (Via 500px. Click to see full size.) “One of a Kind” by Thomas Dawson (Via 500px. Click to see full size.)James Cameron actually did base Avatar‘s floating peaks off of the Zhangjiajie pillars. One film designer said that the team was inspired by “many different types of mountains, but mainly the karst limestone formations in China… Guilin, Huangshan, and Zhangjiajie.” “This is one of my favorite peaks,” said photographer Dawson. “One can only wonder as to how many more years or centuries this amazing formation can stay standing tall in such a delicate balancing act.”Dawson created this image with his Canon EOS 5D Mark III at 20mm, 1/13 of a second, f/14, and ISO 100. |
|
Shooting
a wedding dress can be a challenge when you are shooting inside a room
without windows or with windows that aren’t in ideal positions. If you
don’t have great window light, don’t fret, just follow the tips that Justin and Mary, professional wedding photographers, share here:
(for those of you reading this by email, the video tutorial can be seen here) When necessary, Justin and Mary bring in artificial lighting to act as window light.  A strobe head is indispensable for wedding photography sans window light. A strobe head is indispensable for wedding photography sans window light.How to Create Your Own Window LightA high quality strobe shot through a softbox looks similar to window light when set up properly. Te Profoto B1 500 Air TTL on a stand and with a modifier creates a large window that you can move around and set at a position that is just perfect for the shot.Justin explains the logic behind using the large Profoto 1′ x 4′ RFi Softbox. It’s larger. It covers almost the entire length of the dress. Alternatively, he suggests a 1.3′ x 2′ softbox. They key is to use as large a modifier as you can to make the most natural-looking light. Where to Position the DressHanging the dress in the window creates a difficult back-lighting situation, whereas hanging it opposite to the window creates an even more difficult flat, hard light. The answer is in choosing one of the other two walls. The choice is in favor of the one that makes the simpler background.“Now, I think the number one problem that us wedding photographers really struggle with is you get into a room and you know where you want to shoot, but there’s nothing to hang that dress on.”Mary shows a novel way of solving the problem with a 3M Command adhesive hook. You can hang the dress wherever it will look best without damaging the walls.  Use an easy-to-remove adhesive hook to hang the dress exactly where you want it. Use an easy-to-remove adhesive hook to hang the dress exactly where you want it.How to Shoot the DressIt’s important to choose the right camera angle to make the dress look its best and include some drama in your photo. Mary shares,“For objects like dresses or the shoes, we like to look for an angle that’s about 90 to 120 degrees.”She explains that the 120 degree angle is preferred, because this is where the shadow starts to take over the highlights, creating a moody feel.  Experiment with angles to find the best light. Experiment with angles to find the best light.“In this case, we’ve made our own window, and a window isn’t scary, so neither is this setup.” |

No comments:
Post a Comment